Creative Graduation Cake Recipe for Every Graduate
Celebrate every graduate with this creative graduation cake recipe. Perfect for making their special day even sweeter and more memorable!
Ingredients
For the Cake:
- 2 ¾ cups all-purpose flour
- 2 ½ teaspoons baking powder
- ½ teaspoon salt
- 1 ½ cups granulated sugar
- 2 sticks unsalted butter softened
- 3 large eggs
- 2 ½ teaspoons vanilla extract
- 1 cup buttermilk or regular milk if preferred
- Optional: Jimmies or sprinkles for added texture and color
For the Frosting:
- 2 sticks unsalted butter softened
- 4 cups powdered sugar
- 2 teaspoons vanilla extract
- ¼ cup milk or more, to reach desired consistency
- Gel food coloring for creating themed or colorful frosting
- Optional: Edible glitter for decoration
For Fondant Decorations:
- White fondant for making graduation caps, diplomas, and books
- Black fondant for tassels and caps
- Gold edible paint or metallic dust optional, for cap and book accents
For Piping and Toppers:
- Piping gel or royal icing to secure decorations
- Graduation-themed cake toppers such as a fondant graduation cap, books, or edible diplomas
- School-colored sprinkles or edible paint to match the graduation theme.
Instructions
Step 1: Prepare the Cake Layers
- Preheat the oven to 350°F (175°C). Grease and flour your cake pans or line them with parchment paper.
- In a medium bowl, whisk together the flour, baking powder, and salt. Set aside.
- In a large bowl, cream together the butter and sugar using an electric mixer until light and fluffy (about 3-4 minutes).
- Add the eggs, one at a time, mixing well after each addition. Stir in the vanilla extract.
- Gradually add the dry ingredients to the butter mixture, alternating with the buttermilk. Begin and end with the dry ingredients. Mix until just combined.
- Pour the batter evenly into the prepared cake pans.
- Bake for 25-30 minutes, or until a toothpick inserted into the center comes out clean. (If making a larger or multi-layer cake, adjust baking times accordingly.)
- Allow the cakes to cool in the pans for 10 minutes, then transfer to wire racks to cool completely.
Step 2: Prepare the Frosting
- In a large bowl, beat the softened butter until creamy using an electric mixer.
- Gradually add powdered sugar, 1 cup at a time, mixing on low speed until fully incorporated.
- Add the vanilla extract and ¼ cup milk. Continue mixing on high until the frosting is smooth and fluffy. Add more milk if needed to achieve a spreadable consistency.
- If you want to color your frosting, divide it into separate bowls and add gel food coloring to each, adjusting for the desired shades.
Step 3: Assemble the Cake
- Once the cake layers are completely cool, level the tops of the cakes using a serrated knife if necessary.
- Place one cake layer on your cake stand or plate. Spread a generous layer of frosting over the top, smoothing it with an offset spatula.
- Place the second cake layer on top and press down gently. Frost the top and sides of the cake with the buttercream frosting.
- Use a spatula to smooth the frosting or create textured patterns, depending on your design preference.
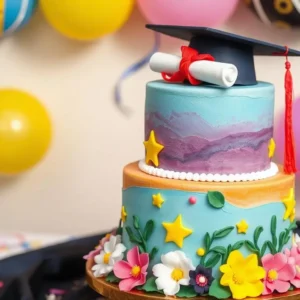
Step 4: Decorate with Fondant
- Roll out the white fondant on a clean surface dusted with powdered sugar. Cut out shapes to create graduation books and diplomas.
- Roll black fondant into small pieces to form the graduation caps and tassels.
- Attach fondant decorations to the cake using piping gel or royal icing. For example, place the fondant diploma and book on the cake and set the graduation cap on top.
- Add metallic edible paint or gold dust to enhance the decorations.
Step 5: Final Touches
- If desired, sprinkle colored jimmies, sprinkles, or edible glitter over the cake for a celebratory look.
- Add personalized elements such as school logos, the graduate's name, or future college details using fondant or edible markers.
- Allow the cake to set in the refrigerator for at least 30 minutes to firm up the decorations before serving.
Notes
-
Cake Variations:
- You can substitute the vanilla cake base with other flavors like chocolate, lemon, or red velvet, depending on your preference or the graduate’s favorite flavors.
- For a lighter version, try using a lower-fat butter substitute, or opt for a dairy-free version by using non-dairy milk and vegan butter.
-
Frosting Tips:
- If you prefer a smoother finish, use a crumb coat (a thin layer of frosting to seal in the crumbs) before applying your final layer of frosting. Let the crumb coat set in the fridge for about 15 minutes before proceeding.
- For a more refined look, you can use Swiss meringue buttercream, which has a silky texture and a less sugary taste compared to traditional buttercream.
-
Fondant Handling:
- Fondant can be tricky to work with. Make sure to knead it thoroughly to soften it before rolling it out. If it’s too dry or cracks, add a small amount of water or shortening.
- You can make your own fondant, or use store-bought fondant for convenience. If using store-bought, be sure to roll it thin to avoid an overly sweet and thick texture on the cake.
-
Decoration Ideas:
- For a more personalized touch, include the graduate’s achievements, such as their degree, honors, or their future plans. This can be done using edible ink pens or hand-painted decorations.
- Consider using edible images of the graduate or their school logo on the cake.
-
Storage:
- If you’re preparing the cake ahead of time, store it in an airtight container at room temperature for up to 2-3 days.
- If you’ve used fondant decorations, the cake can be stored in the fridge for up to a week. Allow it to come to room temperature before serving to maintain the texture.
-
Serving Suggestions:
- Serve the cake with a scoop of vanilla or chocolate ice cream for an extra indulgent treat.
- For a lighter alternative, pair it with fresh fruit like strawberries or raspberries to balance out the sweetness.
-
Make-Ahead Tips:
- Bake the cakes 1-2 days before the event and store them wrapped tightly in plastic wrap at room temperature.
- Frost and decorate the cake a day ahead to save time on the big day, but be sure to keep it in a cool place to avoid the frosting melting or becoming too soft.