Awesome Dinosaur Cake Recipe for Your Little Adventurer
Imagine the excitement on your child’s face when they see a dinosaur cake. It turns their birthday into a prehistoric adventure. Every child who loves dinosaurs dreams of a cake that brings these creatures to life.
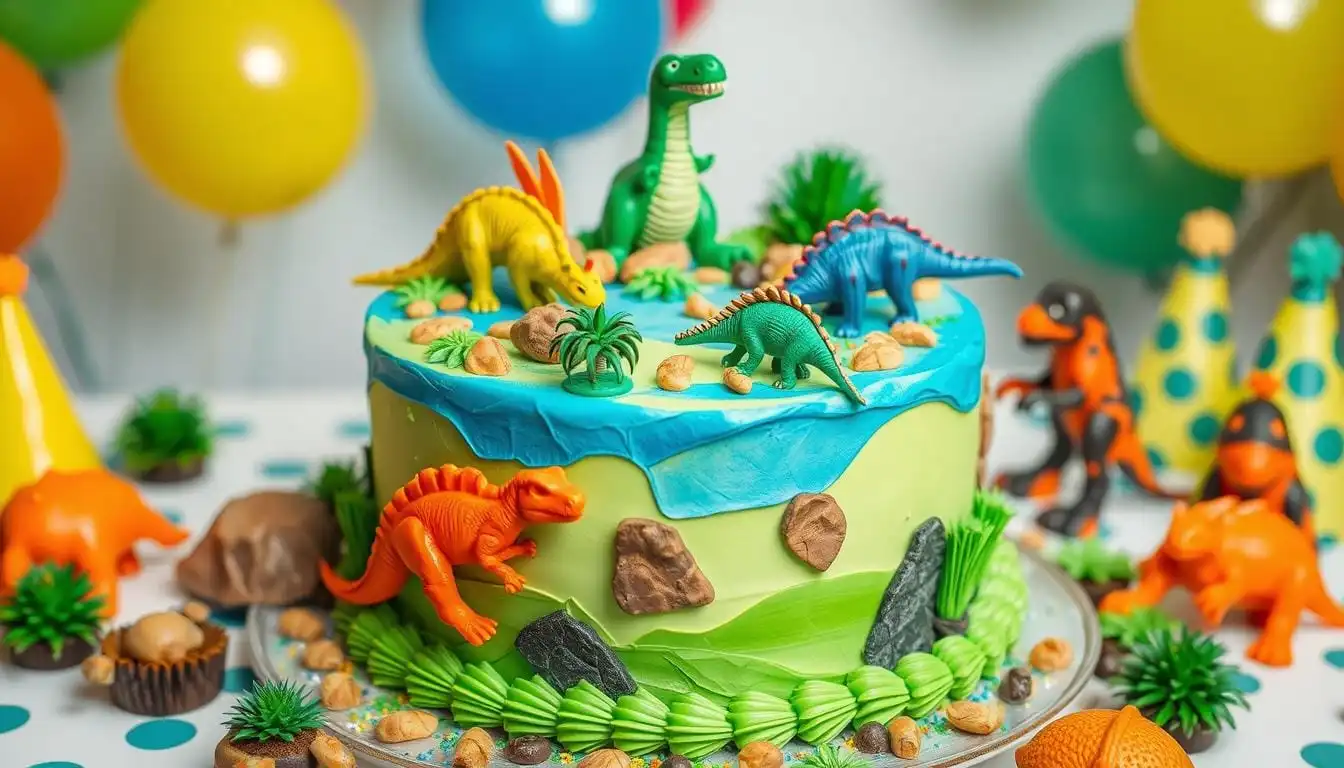
Making a dinosaur cake is more than baking. It’s about creating a special moment that will make your child’s eyes light up. You can make a simple cake with dinosaur footprints or a detailed 3D T-Rex. This guide will help you make a dinosaur cake that will make your child’s birthday unforgettable.
Dinosaur birthday cakes can be as simple or as complex as you want. You can make a towering volcano cake or a cake with a fossil dig design. You’ll learn many decoration techniques to make your cake stand out. Get ready to make delicious memories in your kitchen.
There are 24 unique dinosaur cake ideas to try. Whether you’re new to baking or a pro at decorating cakes, you’ll find something perfect. Your child’s prehistoric party dreams will come true with these designs.
Table of Contents
Transform Your Kitchen into a Prehistoric Bakery
To make an easy dinosaur cake, you need to prepare well and have the right tools. Your kitchen will turn into a magical place where baking meets dinosaur fun. Getting ready ahead of time makes decorating the cake fun and easy.
Essential Baking Tools and Equipment
First, collect these important baking tools:
- 9-inch round cake pans
- Stand mixer or electric hand mixer
- Offset spatula
- Cake turntable
- Cooling racks
- Measuring cups and spoons
Key Ingredients for the Perfect Cake Base
Your dinosaur cake needs top-notch ingredients. Choose fresh, high-quality items for the best taste:
- All-purpose flour
- Granulated sugar
- Large eggs
- Unsalted butter
- Vanilla extract
- Baking powder
Special Decorating Supplies Needed
To make your cake look like a prehistoric scene, use these decorations:
- Fondant in various colors
- Food-grade coloring gels
- Piping bags and tips
- Edible dinosaur figurines
- Textured rolling pin
- Modeling tools
“The secret to an amazing dinosaur cake is preparation and imagination!” – Professional Baker
With these tools and ingredients, you’re set to create a dinosaur cake that will impress everyone!
Creating the Perfect Dinosaur Cake Base
Making a homemade dinosaur cake begins with a fantastic cake base. This base should be tasty and sturdy for decorating. It’s the foundation of your dinosaur cake recipe.
For your dinosaur cake, we suggest a 6-inch, 3-layer banana cake. It’s sweetened naturally with bananas and maple syrup. This makes it a healthier choice for kids.
Cake Base Ingredients
- 250 g (2 cups) all-purpose flour
- 114 g (½ cup) softened butter
- 2 eggs
- 237 ml (1 cup) milk
- 5 ml (1 teaspoon) vanilla extract
Creating a perfect dinosaur cake recipe requires careful preparation. Each layer needs 1/2 cup of frosting for filling and coating. Let your cakes cool completely, which takes about 1 to 1.5 hours at room temperature.
“A great cake is the foundation of an amazing dinosaur creation!” – Baking Enthuasiast
Baking Tips
- Preheat oven to 350ºF (177ºC)
- Use two 8-inch round cake pans
- Bake for 30-35 minutes
- Check doneness with a clean toothpick
Pro tip: You can prepare individual cake layers up to 2 days in advance. They can be frozen for up to 1 month if wrapped tightly. This simplifies party prep!
Flavor Variations
- Vanilla
- Chocolate
- Yellow
- Strawberry
After baking and cooling your layers, you’re set to create a prehistoric masterpiece. It will surely thrill any dinosaur fan!
Essential Decorating Techniques for Prehistoric Details
To make your dinosaur cake stand out, you need to learn some decorating tricks. Focus on texture, color, and detail to bring your prehistoric masterpiece to life. Here are some exciting dinosaur cake ideas to make your creation unforgettable.
Starting a dinosaur cake tutorial means learning to add realistic and exciting elements. These details will amaze your young dinosaur fans. The right techniques can turn a simple cake into a detailed prehistoric scene.
Working with Fondant for Dinosaur Features
Fondant is great for making detailed dinosaur features. Here are some tips for success:
- Roll fondant to a thin, even thickness for smooth dinosaur skin
- Use texture mats to create realistic scale patterns
- Cut precise shapes for dinosaur body parts
- Apply food-safe paint for additional color depth
Mastering Buttercream Textures
Buttercream is perfect for creating amazing landscape elements with a piping bag. Try these techniques:
- Use a star tip to create tall grass and foliage
- Blend green shades for natural-looking terrain
- Create rocky surfaces with textured piping
- Layer colors for depth and dimension
Creating Realistic Landscape Elements
Your dinosaur cake tutorial needs an immersive environment. Add these elements:
- Edible rocks made from fondant
- Chocolate “mud” terrain
- Sugar glass for water features
- Small fondant trees and plants
“The magic is in the details. Every tiny element tells a story of prehistoric wonder.” – Professional Cake Decorator
With these techniques, your dinosaur cake will take guests on a thrilling journey to the prehistoric world. It will spark their imagination and leave lasting memories.
Step-by-Step Dinosaur Cake Assembly Guide
Making a dinosaur cake is all about planning and precision. It begins with a solid base of cake layers.
Start by getting your cake layers ready. You’ll need five big layers (28 cm diameter) and two small ones (15 cm diameter). Freezing your layers for about 2 hours before carving helps make clean cuts.
- Level and stack cake layers using boba straws for stability
- Apply a thin crumb coat of chocolate ganache
- Chill the cake for 2 hours to set the first ganache layer
- Add a second ganache layer and chill for an additional hour
To decorate your dinosaur cake, mix your fondant colors. Use yellow and green mainly, with white and black for details.
“The key to an amazing dinosaur cake is in the details!” – Professional Baker
For covering your cake with fondant, have these tools ready:
- Rolling pin
- Cornstarch for dusting
- Silicone impression mat
- Edible powder colors
| Cake Layer Size | Diameter | Serves |
|---|---|---|
| Large Layers | 28 cm (11 in) | Up to 30 people |
| Small Layers | 15 cm (6 in) | Up to 12 people |
Pro Tip: To finish your scene, pipe a small blue river. It adds realism to your dinosaur cake.
Creative Dinosaur Cake Topper Ideas
Make your dinosaur cake stand out by choosing the right toppers. Whether it’s a birthday or a themed party, the right decorations can turn a simple cake into a prehistoric wonder.
Handmade vs Store-bought Toppers: Pros and Cons
You have two main choices for dinosaur cake toppers:
- Handmade Toppers
- Completely unique design
- Personalized to match your specific theme
- Can be made from fondant or gum paste
- Store-bought Toppers
- Quick and convenient
- Wide variety of dinosaur styles
- Often more affordable
Strategic Positioning and Arrangement Tips
To create an engaging dinosaur scene, think about where to place your toppers. Here are some tips:
- Create depth by positioning dinosaurs at different heights
- Use landscape elements like rocks or vegetation
- Arrange toppers to tell a small narrative
Edible vs Non-edible Decorations
Your dinosaur cake toppers can be either edible or non-edible. Fondant toppers are tasty and blend in seamlessly. Plastic figurines are durable and can be kept as a memento.
“The right dinosaur cake topper can turn a simple dessert into an unforgettable prehistoric adventure!” – Cake Design Experts
With 75% of creative cakes using fondant, you have lots of ideas to make a dinosaur cake that will wow everyone. It’s perfect for young paleontologists and cake enthusiasts alike.
Troubleshooting Common Dinosaur Cake Challenges
Making an easy dinosaur cake can be tricky, but don’t worry! Most baking challenges have simple solutions. Knowing the common problems will help you make a prehistoric masterpiece that will impress your little adventurers.

- Fondant Tearing: Knead your fondant well and use cornstarch to prevent sticking. Roll it out gently and evenly to avoid tears.
- Color Bleeding: Use gel food coloring instead of liquid. Make sure each layer is dry before adding more color.
- Structural Instability: Use support dowels in multi-layered dinosaur cakes. Chill the cake between decorating stages to keep its shape.
“Patience is key when creating a show-stopping dinosaur cake!” – Professional Cake Decorator
Time management is key for your dinosaur cake project. Break it down into stages:
- Bake cake layers (32.5 minutes average baking time)
- Cool completely (1.25 hours recommended)
- Crumb coat and chill (25 minutes setting time)
- Final decoration
Pro tip for your easy dinosaur cake: Mix 10 drops yellow and 5 drops green food coloring for realistic prehistoric textures. Remember, practice makes perfect!
Storage and Transportation Tips
Making a dinosaur birthday cake is just the start. Keeping it safe during storage and transport is key. You need to plan carefully and pay attention to details.
Storing your dinosaur cake right is important. Keep it in a cool, stable place away from sunlight and heat. Refrigeration is good for buttercream and fondant, but watch out for moisture.
- Use a cake carrier with a secure lid
- Place non-slip mats underneath the cake board
- Pack extra support materials like dowels for stability
- Avoid sudden temperature changes
Transporting your cake needs smart planning. Get a strong cake box that fits your dinosaur cake well. If you can, carry the cake base and decorations separately to avoid damage.
“The key to a successful dinosaur birthday cake delivery is preparation and gentle handling.” – Baking Experts
For long trips, take extra steps:
- Chill the cake before transport
- Use non-slip mats in your vehicle
- Drive carefully, avoiding sudden stops
- Have emergency repair tools on hand
Follow these tips, and your dinosaur cake will arrive looking amazing. It will impress all the young paleontology fans!
Conclusion
Making the perfect dinosaur cake is a fun adventure. It mixes creativity, skill, and joy. With 25 dinosaur cake ideas, you can create a memorable centerpiece for any celebration.
Whether it’s a T-Rex for a 5th birthday or a simple dino treat, your cake can be a hit. Dinosaur cake designs are very flexible. You can go from simple to elaborate, making each cake unique.
Embrace your creativity and have fun making it. Techniques like buttercream piping can turn a simple cake into a prehistoric wonder. This can capture imaginations and create lasting memories.
Don’t forget about dietary needs. You can make a gluten-free chocolate cake for everyone to enjoy. This way, you can make a cake that shows your child’s love for dinosaurs, making their birthday special.
We encourage you to share your dinosaur cake creations. Your design might inspire others to create something amazing. Happy baking, and may your celebration be unforgettable!
FAQ
How difficult is it to make a dinosaur cake at home?
What type of cake works best for a dinosaur-themed design?
How far in advance can I make a dinosaur cake?
Do I need professional baking experience to create a dinosaur cake?
What are the essential tools I’ll need for making a dinosaur cake?
How can I transport a decorated dinosaur cake safely?
Can I make the dinosaur cake decorations in advance?
What are some budget-friendly alternatives for cake decorations?
How do I prevent fondant from cracking or tearing?
Are there any allergy-friendly options for dinosaur cake ingredients?
Awesome Dinosaur Cake Recipe for Your Little Adventurer
Ingredients
🍌 Cake Base Ingredients (Banana Cake – 3 Layers)
- 2 cups 250 g all-purpose flour
- ½ cup 114 g unsalted butter, softened
- 2 large eggs
- 1 cup 237 ml milk
- 1 teaspoon 5 ml vanilla extract
- ¾ cup mashed ripe bananas
- 2 tablespoons maple syrup
- 1 tablespoon baking powder
- ¼ teaspoon salt
🧁 Frosting & Decorating Ingredients
- 1 ½ cups unsalted butter for buttercream
- 3 cups powdered sugar
- 2 –3 tablespoons milk or cream
- Gel food coloring yellow, green, blue, black
- Fondant white, green, yellow, black
- Edible dinosaur toppers or figurines optional
- Edible powder colors optional
- Boba straws or dowels for support
- Ganache optional crumb coat
Instructions
Make the Cake Layers
- Preheat oven to 350°F (177°C).
- Grease and flour two 8- or 9-inch round cake pans.
- In a large bowl, beat butter and sugar until fluffy.
- Add eggs one at a time, then mix in mashed bananas, vanilla, and maple syrup.
- In a separate bowl, mix flour, salt, and baking powder.
- Alternate adding dry ingredients and milk to the wet mixture.
- Divide batter evenly between pans and bake for 30–35 minutes.
- Let cool completely on racks (1–1.5 hours).
Prepare the Frosting
- Beat butter until light.
- Gradually add powdered sugar, then milk to reach desired consistency.
- Tint buttercream with green, brown, or blue for landscape effects.
Assemble the Cake
- Level cake layers. Stack with frosting between each layer.
- Insert boba straws for stability.
- Apply a crumb coat (thin layer of ganache or buttercream). Chill for 30 minutes.
- Add a second layer of frosting and smooth the surface.
Decorate with Fondant
- Roll fondant and cover the cake smoothly. Use texture mats for dinosaur skin.
- Create fondant rocks, trees, and dino tracks. Use edible paints for detail.
- Position toppers and create a mini landscape with grass and rivers using buttercream.
Serve or Store
- Chill until ready to serve.
- Transport in a sturdy cake box with support dowels and non-slip mats.
Did You Try Our Recipe?
There are no reviews yet. Be the first one to write one.