
Easy Vintage Cake Recipe (Step-by-Step Guide!)
Do you remember the magical smell of grandma’s kitchen? It was filled with the sweet aroma of a nostalgic pastry. Vintage cake baking is more than just making a dessert. It’s about connecting with old culinary traditions that have brought joy to many.
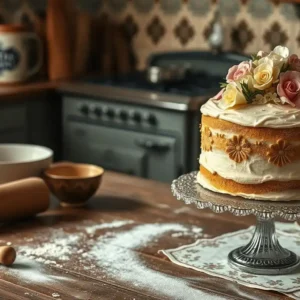
When you bake a vintage cake, your kitchen becomes a time capsule. Each ingredient and technique tells a story. These cakes are not just recipes. They are a tasty trip through culinary history.
Are you new to baking or want to try traditional methods? This guide will show you how to make a real vintage cake. You’ll learn old techniques and use classic ingredients.
You’ll learn how to pick the best King Arthur Flour and master 19th-century cake decoration. This guide will help you make a beautiful vintage cake. It will show your creativity while honoring traditional baking.
Get ready for a fun baking adventure that connects you to home bakers through the ages. Your journey into vintage cake baking begins now!
Table of Contents
Understanding the Art of Vintage Cake Making
Explore the magical world of antique desserts that take you back in time. Vintage cake making is more than a skill—it’s a beautiful art form. It celebrates the rich traditions of old-fashioned cake creation.
The journey of creating heirloom recipes starts with understanding what makes vintage cakes special. From the Victorian era to today, these cakes have won the hearts of bakers everywhere.
History of Victorian-Era Cake Decoration
Victorian-era cake decoration became a true art form. It reflected the ornate architectural styles of the 19th century. Bakers turned simple cakes into elaborate masterpieces, inspiring modern pastry chefs.
“Vintage cakes are not just desserts; they are edible works of art that tell a story of culinary craftsmanship.” – Baking Historian
Essential Tools and Equipment
- Stand or hand mixer
- Cake pans of various sizes
- Serrated knife for leveling
- Offset spatula
- Piping bags and tips
Basic Principles of Vintage Cake Design
| Design Principle | Key Characteristics |
|---|---|
| Symmetry | Balanced and precise decorations |
| Color Palette | Soft pastels and ivory tones |
| Layering | Delicate and intricately layered cakes |
Start your vintage cake journey by mastering these basic principles. The Lambeth Method of piping is a standout technique. It allows bakers to create detailed designs that capture the essence of historical cake decoration.
Whether you’re new to baking or have experience, vintage cake making is a delightful journey. It connects us to generations of baking traditions.
Preparing Your Workspace and Ingredients
Making a traditional cake is more than just a recipe. Your workspace and how you prepare your ingredients are key to success. A clean, organized kitchen is essential for creating a delicious classic confection that will wow your loved ones.
Before starting, make sure you have all the necessary tools for your vintage cake journey:
- Rotating cake stand
- Offset spatulas
- Piping bags and tips
- Bench scraper
- Digital kitchen scale
Preparing your ingredients is vital for a perfect traditional cake. Make sure these items are at room temperature for the best mixing:
- Butter
- Eggs
- Milk
*”The secret to a perfect cake lies not just in the recipe, but in the careful preparation of your ingredients and workspace.”*
Here are some pro tips for preparing your ingredients for your classic confection:
- Sift dry ingredients to prevent lumps
- Measure precisely using a digital scale
- Use fresh, high-quality ingredients
- Clean and organize your workspace before starting
Pay close attention to detail to turn a simple baking session into a joyful experience. A well-prepared workspace ensures your traditional cake will be a masterpiece of flavor and texture.
Classic Vintage Cake Base Recipe
Making the perfect vintage cake is all about precision and passion. It’s a timeless treat that needs careful attention from start to finish. Your journey begins with mastering the basic techniques that turn simple ingredients into a masterpiece.
Mastering vintage cake baking involves key steps for perfect results every time.
Precise Measuring Techniques
Accuracy is essential when making your vintage cake. Here are some tips:
- Always use standardized measuring cups and spoons
- Level dry ingredients with a straight edge
- Measure liquids at eye level for precision
- Weigh ingredients when possible for consistent results
Optimal Baking Temperature and Timing
The right temperature is critical for your cake. Follow these guidelines:
- Preheat the oven to 350°F (175°C)
- Use 3 6-inch pans for a perfect cake layer
- Bake for 25-30 minutes
- Check doneness with a toothpick test
Cooling and Leveling Methods
Proper cooling makes your cake extraordinary:
- Allow cakes to cool in pans for 10 minutes
- Remove from pans and cool completely on wire racks
- Use a serrated knife to level cake layers
- Chill layers before final decoration
“Baking is love made edible” – Unknown Pastry Chef
Remember, patience is key to making the perfect vintage cake. Take your time, follow each step carefully, and you’ll create a dessert that tells a delicious story of culinary tradition.
Creating the Perfect Swiss Meringue Buttercream

Swiss meringue buttercream is the top choice for adding elegance to your baking. It makes cakes look like art with its smooth texture.
Making Swiss meringue buttercream is a delicate process. Here’s what you need to do:
- Heat egg whites and sugar to 160°F
- Whip mixture to stiff, glossy peaks
- Incorporate room-temperature butter gradually
- Achieve perfect, stable consistency
Here’s what you’ll need for this classic frosting:
| Ingredient | Quantity | Purpose |
|---|---|---|
| Egg Whites | 150g (5 large eggs) | Structural base |
| Caster Sugar | 320g | Sweetness and stability |
| Unsalted Butter | 400g | Richness and texture |
For perfect results, make sure your butter is precisely room temperature. Add butter slowly to keep the meringue light and fluffy.
“With patience, humble ingredients become a timeless pastry masterpiece.” – Vintage Baking Experts
Don’t worry if your buttercream looks curdled. Just keep mixing. If it’s too soft, chilling it for 30 minutes will fix it.
Vintage Cake Layering and Crumb Coating
Making an antique dessert needs care and patience. The art of layering a cake turns a simple treat into a beautiful vintage piece. Bakers know layering is key for a perfect look.
Layer Assembly Secrets
Here are tips for assembling your vintage cake layers:
- Use a rotating cake stand for even positioning
- Place a small dollop of frosting on the cake board to anchor the first layer
- Apply filling evenly, leaving a small border to prevent overflow
- Use a serrated knife to level cake layers for perfect alignment
Achieving Sharp Edges
Sharp edges make a cake look professional. To get crisp lines:
- Apply a thin crumb coat to seal in cake crumbs
- Chill the cake for 15-20 minutes to set the initial layer
- Use a bench scraper for smooth, straight sides
- Rotate the cake stand while scraping for consistent edges
Proper Chilling Techniques
Chilling is key in making a vintage cake. It helps keep your dessert stable and prevents problems. Chill for 15-30 minutes between decorating steps.
“Patience in cake decorating is not just a virtue, it’s a necessity.” – Vintage Cake Experts
Creating a stunning vintage cake takes time and practice. Each layer you add brings you closer to mastering this art.
Mastering Traditional Piping Techniques
To turn your heirloom recipe into a classic confection, you need to master cake decoration. Piping techniques are key to making a simple cake look stunning. Whether you’re new or want to improve, learning different piping methods will help you grow.

Piping is not just decoration; it’s a skill that takes practice and precision. Here are the top piping tips every baker should know:
- Round tips (sizes 1-3): Perfect for detailed work and fine lines
- Star tips: Make beautiful rosettes and borders
- Petal tips: Create realistic flowers with soft details
- Leaf tips: Add natural foliage to your cake
Choosing the right piping tip can change your cake’s look. Here are some expert tips:
| Tip Type | Best Use | Skill Level |
|---|---|---|
| Round Tip | Writing, fine details | Beginner |
| Open Star Tip | Swirls, borders | Intermediate |
| Petal Tip | Floral decorations | Advanced |
Pro tip: Practice is key. Start with bigger tips and simpler designs. Then, move to more detailed techniques. Your heirloom recipe deserves a beautiful presentation that shows your passion and skill.
“Cake decorating is an art that speaks without words, telling a story through every delicate piped design.” – Professional Pastry Chef
Invest in a good piping kit with many tips to grow your skills. With patience and practice, you’ll make ordinary cakes into amazing edible art.
Decorative Elements and Color Schemes
Turn your traditional cake into a timeless treat with the right decorations. These elements bring vintage elegance to life. Cake decoration is more than just frosting—it’s about making a visual masterpiece.
Natural Food Coloring Magic
Explore the charm of natural food coloring for your vintage cake. Your colors can include:
- Beet powder for soft pink and red hues
- Matcha for delicate green tones
- Cocoa powder for rich brown shades
Vintage-Inspired Color Palettes
About 50% of vintage cakes use blush and ivory colors. Choose soft pastel shades for a nostalgic look:
- Blush pink
- Mint green
- Baby blue
- Lavender
Elegant Finishing Touches
Make your cake stand out with elegant ribbons and decorations. Around 70% of vintage cakes have:
- Sugar pearls
- Gold accents
- Delicate lace patterns
- Hand-painted floral details
“A well-decorated cake is a work of art that tells a story of tradition and elegance.” – Vintage Baking Expert
With these tips, you’ll make a traditional cake that’s more than just dessert. It’s a timeless treat that celebrates vintage beauty.
Conclusion
Mastering vintage cake baking is an exciting journey. It turns home bakers into true pastry artists. You start by learning the techniques and history of these classic desserts.
Nearly 29% of bakers now focus on vintage and retro trends. This makes it a great time to dive into these classic cake designs.
As you get better at vintage cake making, remember each cake has a story. Whether it’s a soft pink birthday cake or an elegant white anniversary dessert, your details will bring it to life. Vintage cakes offer endless possibilities, from delicate lemon flavors to fancy piping.
Your love for vintage cake making will grow with each try. Don’t get discouraged by early setbacks. Every great baker began where you are now. Try new flavors, colors, and let your creativity shine.
Vintage cake decoration is more than a skill; it’s an art form. It celebrates history, creativity, and the joy of baking. Keep practicing, stay inspired, and enjoy your vintage cake journey.
FAQ
What makes a cake considered “vintage”?
Do I need special equipment to make a vintage cake?
How difficult is it to create a vintage-style cake?
What are the most traditional flavors for vintage cakes?
How long does it take to decorate a vintage cake?
Can I make a vintage cake without professional training?
What’s the most challenging part of creating a vintage cake?
How far in advance can I prepare a vintage cake?
Are vintage cakes only suitable for special occasions?
What’s the best way to preserve the vintage cake design?
Step-By-Step Vintage Cake Recipe for Beginners
Equipment
- Stand or hand mixer
- 3 x 6-inch cake pans
- Rotating cake stand
- Offset spatulas
- Piping bags and assorted tips
- Bench scraper
- Serrated knife
- Digital kitchen scale
- Mixing bowls
- Wire cooling racks
Ingredients
Vintage Cake Base
- 2 ½ cups 300g all-purpose flour (King Arthur recommended)
- 2 tsp baking powder
- ½ tsp salt
- 1 cup 226g unsalted butter, room temperature
- 1 ¾ cups 350g granulated sugar
- 4 large eggs room temperature
- 1 tbsp vanilla extract
- 1 cup 240ml whole milk, room temperature
Swiss Meringue Buttercream
- 150 g egg whites about 5 large eggs
- 320 g caster sugar
- 400 g unsalted butter room temperature
Optional Add-ins
- Beet powder matcha, cocoa (for natural coloring)
- Sugar pearls gold leaf, edible lace (for decoration)
Instructions
Prepare Cake Batter
- Preheat oven to 350°F (175°C). Grease and line 3 x 6-inch cake pans.
- Sift flour, baking powder, and salt.
- Cream butter and sugar until fluffy. Add eggs one at a time.
- Mix in vanilla. Alternate adding flour mixture and milk.
- Divide into pans and bake 25–30 minutes. Test with a toothpick.
- Cool in pans 10 minutes, then transfer to wire racks.
Level and Chill Layers
- Use a serrated knife to level each layer.
- Wrap and chill for 30 minutes before assembly.
Make Swiss Meringue Buttercream
- Heat egg whites and sugar over simmering water until 160°F.
- Whip to stiff peaks. Slowly add butter until creamy and smooth.
- Optional: Add natural food coloring.
Assemble Cake
- Use a cake board with a dab of frosting to anchor the first layer.
- Spread even layers of buttercream between cakes.
- Apply crumb coat, chill for 20 minutes.
- Finish with final coat using a bench scraper for sharp edges.
Decorate
- Use star, petal, leaf, and round piping tips to decorate.
- Apply sugar pearls, vintage floral patterns, or edible gold.
- Stick to vintage color palettes: blush, ivory, mint, lavender.
Did You Try Our Recipe?
There are no reviews yet. Be the first one to write one.