
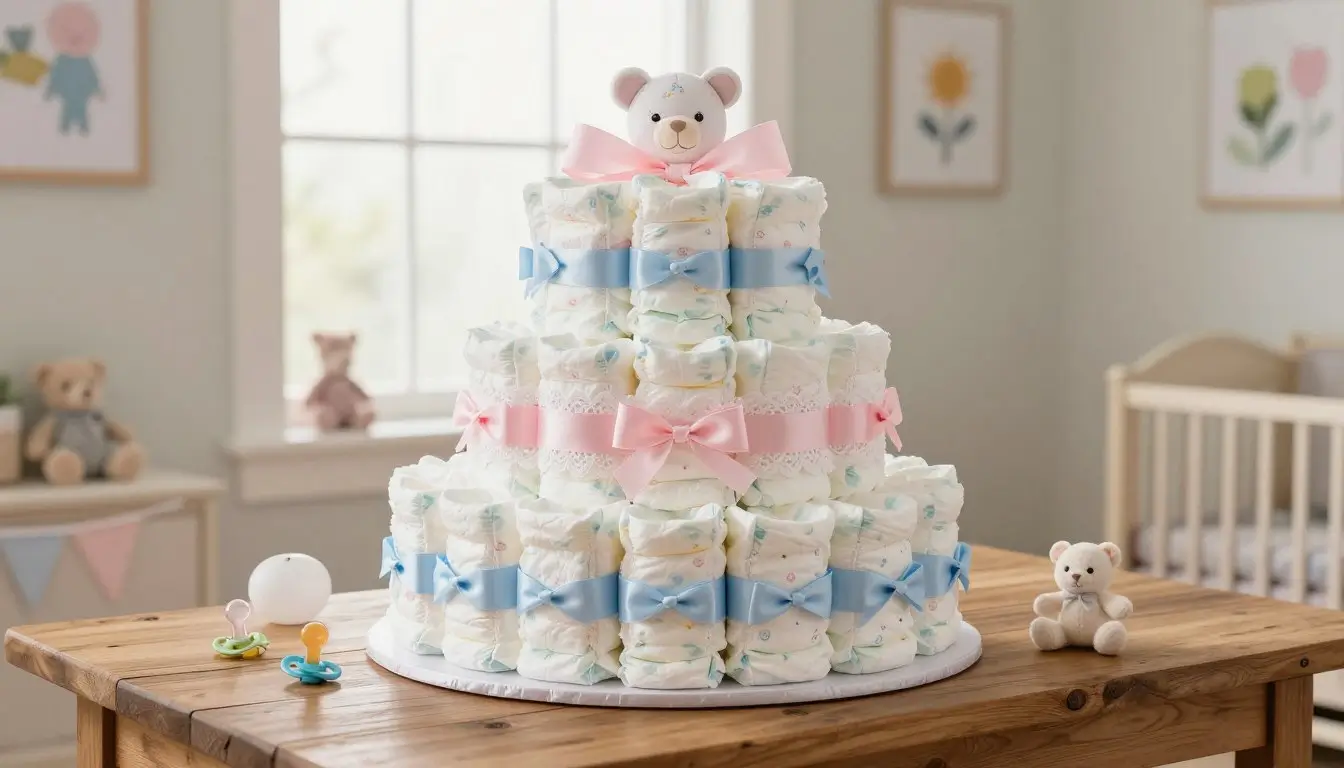
Can You Really Make a Diaper Cake This Beautiful at Home?
When you enter a nursery celebration, you aim to make a lasting impression. Finding the ideal baby shower gift can be overwhelming. You might think your budget is too small for something both stylish and practical.
Imagine the look on their faces when they see a handcrafted centerpiece that’s both beautiful and useful. A unique baby gift doesn’t need to break the bank or require expert skills. Many believe making a diy diaper cake is too hard for beginners.
But, you can make a gorgeous Diaper Cake with patience and basic tools. This project turns essential items into a stunning display. It helps families deal with the costs of early parenthood. With a few easy steps, you’ll create a functional masterpiece that shows your care.
Table of Contents
Essential Supplies for Your DIY Diaper Cake
Starting a stunning centerpiece means picking top-notch materials for your diaper cake. Getting everything ready keeps your project stable and looks great from the start. By getting these items before starting your diaper cake tutorial, you save time and avoid headaches.
Selecting the Right Diapers and Sizes
Choosing the right diaper size is key for a useful gift. Newborn sizes are cute but quickly outgrown. Going for size 1 or 2 diapers is better, as they last longer.
Choose absorbent, high-quality brands that keep their shape when rolled. Keeping all tiers the same size keeps your cake balanced and even.
| Diaper Size | Best Use Case | Value for Parents |
|---|---|---|
| Newborn | Small decorative cakes | Low (Short usage time) |
| Size 1 | Standard tiered cakes | High (Versatile) |
| Size 2 | Large, stable cakes | Excellent (Long-term use) |
Must-Have Structural Tools and Adhesives
A strong base is essential for every project. Use a round cardboard cake board or a decorative platter for support. Reliable adhesives are also key to keeping your cake together during transport.
A full-sized hot glue gun is your go-to for securing decorations. Also, have clear rubber bands ready to hold the rolls in place before adding the final touches.
Decorative Elements and Finishing Touches
The look of your diaper cake depends on your embellishments. Satin ribbon is great for hiding rubber bands and adding elegance. Adding baby essentials like washcloths, socks, or small toys can also enhance the theme.
Using fabric scraps or lace can add texture and depth. Remember, your goal with this diaper cake tutorial is to make something beautiful and practical for new parents.
Preparing Your Workspace and Materials
Getting your station ready is key to a fun crafting time. A clear plan makes your diaper cake tutorial smooth and enjoyable.
Sanitizing and Organizing Your Supplies
First, make sure your workspace is clean and sanitized. A big, flat table is perfect for your Diaper Cake project.
Put all your supplies in one spot to avoid distractions. Having diapers, rubber bands, and decorations close helps you work better.
Rolling Diapers for a Uniform Look
For a neat look, roll diapers evenly. Start with a diaper flat on the table, pattern side down.
Roll the diaper tightly from the front to the back. Keep it tight and even to avoid unraveling.
If your rolls are uneven, unroll and try again. With practice, rolling diapers will become easy.
Securing Diapers with Rubber Bands
After rolling, use a small rubber band to hold it. This keeps your Diaper Cake shape during assembly.
Choose good quality, small rubber bands. They keep diapers tight without harming the fabric. This makes building your tiers faster.
Organize your rolled diapers in groups to track your work. This method makes a repetitive task fun and highly rewarding.
How to Make a Diaper Cake Base
Want to make a diaper cake that stands tall? Start with a solid bottom tier. This base is the key to keeping your gift stable and upright. It’s the first step to a beautiful, stable final product.
Constructing the Bottom Tier
Start with a sturdy cardboard cake board. Make sure it’s big enough for your desired size. Place rolled diapers upright in a tight circle on the board. Consistency is key here; every diaper should face the same direction for a clean look.
Creating Stability with a Central Support
To keep your creation steady, you need a strong core. Put a clean paper towel tube or a cardboard cylinder in the center of your board. This support is the backbone of your Diaper Cake, allowing you to build layers around it.
Layering Diapers for a Professional Finish
After setting up your central support, add more diapers around it until you reach the board’s edge. Use large rubber bands to keep each diaper ring tight against the center tube. When you learn how to make a diaper cake, you’ll see that tight packing is key. This method keeps your Diaper Cake looking polished and balanced for the big reveal.
Assembling the Middle and Top Tiers

Building the upper tiers is where your creativity shines. You start with a solid base and add height to your Diaper Cake. This step needs patience and a steady hand for perfect layers.
Scaling Down for Tiered Dimensions
To get that classic look, use fewer diapers in each layer. The middle tier should be about two-thirds the size of the base. The top tier is even smaller, with just a few diapers for a charming, petite peak.
Keeping things consistent is important. Count your diapers carefully for each layer. This ensures your Diaper Cake looks balanced and beautiful.
Stacking and Aligning the Tiers
Put your middle tier in the base’s center. Make sure the diapers are even and smooth. Do the same for the top tier, keeping it centered for structural symmetry.
If the tiers move, use a bit of double-sided tape to hold them. This keeps your Diaper Cake neat and professional.
Ensuring Structural Integrity
For tall designs, you might need extra support. A wooden dowel through the middle helps a lot. Or, use small cardboard circles between the layers for sturdy platforms.
After stacking, wrap each tier with ribbon to hide the rubber bands. This step is key for a polished, sophisticated finish. The ribbon not only hides the mechanics but also adds a touch of elegance to your gift.
Creative Diaper Cake Decorations and Themes
Turning diapers into a beautiful centerpiece needs creativity and a clear idea. Whether it’s for a boy or girl, your diaper cake can be the event’s highlight. Choosing a theme makes your gift both useful and lovely.
Choosing Themes for Boys and Girls
For a diaper cake for boys, think about navy blue, forest green, or soft grey. Add nautical, woodland, or vintage aviation to make it fun. These themes give a cool, baby shower look.
For a diaper cake for girls, soft pastels like blush pink or mint green are timeless. Add floral, butterfly, or gold foil touches for elegance. Soft neutrals like cream or beige are great for a modern look.
Incorporating Baby Essentials as Decor
Make your diaper cake ideas better by adding useful items. Use rolled-up washcloths as colorful accents. Folded baby socks or bibs add texture and usefulness.
Faux florals and greenery make your gift look professional. They fill gaps and give a polished finish. Make sure attached items are easy to remove without harming the diapers.
Using Ribbons and Fabric for a Polished Look
Ribbons are key for diaper cake decorations. Use satin or grosgrain ribbons that match your colors. Layer different ribbons for depth and interest.
Fabric swatches or lace trim add a soft, textured look. This makes your diaper cake look like a dessert while staying sturdy. See the table below for theme ideas.
| Theme Style | Primary Colors | Key Accents |
|---|---|---|
| Woodland Boy | Forest Green, Brown | Miniature plush bears, burlap |
| Floral Girl | Blush Pink, Cream | Silk flowers, lace ribbon |
| Modern Neutral | Sage Green, White | Wooden teethers, muslin cloth |
| Nautical Baby | Navy, Red, White | Small anchors, striped ribbon |
Common Mistakes to Avoid During Assembly

Even experienced crafters can face surprises when making a gift. The process is fun, but small mistakes can ruin your Diaper Cake. Spotting these issues early helps keep your project both lovely and useful.
Preventing Diaper Damage
One big mistake is using harsh materials that harm the diapers. Never use hot glue or sharp pins on the fabric. These can tear the diapers, making them useless for the parents.
Instead, use gentle methods to hold things together. Here are some safe options:
- Wrap wide decorative ribbons around the tiers.
- Choose high-quality rubber bands that don’t break easily.
- Use double-sided tape on the cardboard base, not the diapers.
Ensuring the Cake Remains Portable
Another problem is when the cake falls apart while moving. If the tiers aren’t well attached to the base, the whole Diaper Cake might fall over. Make sure each layer is tightly fixed to the base for stability.
Test your cake’s stability by shaking the base before adding decorations. If it wobbles, add more ribbons or hidden dowels. A strong base means a smooth delivery.
Balancing Aesthetics and Functionality
It’s tempting to add lots of decorations, but remember the parents will need to take it apart. Too much glue or complex wiring makes the Diaper Cake hard to unpack. Aim for a beautiful gift that’s also practical for the new parents.
Here are some tips to keep your gift balanced:
- Keep the diapers clean and free of sticky residue.
- Make sure all baby items added as decor can be easily removed.
- Avoid using too much tape that might damage the diaper packaging.
By making these simple changes, your Diaper Cake will be a success. A thoughtful assembly makes your gift both beautiful and useful for the family.
Tips for Transporting and Gifting Your Creation
You’ve spent hours on your Diaper Cake. Now, let’s talk about how to carry and give it away with pride. Making sure it arrives in perfect shape is the last step of your project.
Wrapping Your Diaper Cake for Presentation
To keep your work looking great, wrap it in clear cellophane. This keeps the diapers safe from dust and spills. It also lets the design show off.
Roll the cellophane over the top and tie it with a ribbon that fits your theme. This simple trick makes your baby shower gift look like it came from a store.
Safe Transport Techniques
When moving a tiered Diaper Cake, keep it steady to avoid any mess. Place it on a flat area in your car, like the floor or trunk.
Don’t put it on a car seat, as it might slide. For long drives, use a non-slip mat under the base for extra stability.
Adding a Personalized Gift Tag
A heartfelt note is the best way to finish your baby shower gift. Write a card to attach to the ribbon, wishing the new parents well.
This personal touch makes your Diaper Cake extra special. It’s a reminder of your effort and care.
| Action Item | Purpose | Best Practice |
|---|---|---|
| Cellophane Wrap | Protection | Use clear, high-quality film |
| Flat Surface | Stability | Use the vehicle floor |
| Gift Tag | Personalization | Handwrite a warm message |
| Non-slip Mat | Security | Place under the base |
Conclusion
Making a Diaper Cake takes patience and creativity. Now, you can make a beautiful, useful gift for any nursery.
Your hard work creates a special baby gift that stands out at any party. Parents love the mix of art and practical items for their baby.
Make sure your Diaper Cake looks good and is useful. This way, it will be the best part of the event.
Show off your Diaper Cake to friends and family. Your skill in making a great Diaper Cake makes you a favorite at baby showers.
Begin planning your next Diaper Cake today. You have the skills to give a unique gift that impresses new parents everywhere.
Frequently Asked Questions
What is the best diaper size to use for a professional diaper cake tutorial?
Size 1 or Size 2 diapers are usually the best choice because babies can use them for a longer period. This makes your diaper cake both decorative and practical for new parents.
How many diapers do I actually need when learning how to make a diaper cake?
A standard three-tier diaper cake typically requires between 50 and 70 diapers. The exact amount depends on the size of the tiers and the brand of diapers used.
What are some creative diaper cake ideas for different genders?
You can customize diaper cakes with themes such as princesses, flowers, sports, safari animals, nautical designs, or classic baby colors. Gender-neutral themes are also popular and work well for baby showers.
How do I attach diaper cake decorations without damaging the diapers?
Avoid placing glue or tape directly on the diapers. Instead, secure decorations to ribbons, bows, or the cake base so the diapers remain clean and usable.
Can I add other baby essentials to my DIY diaper cake?
Yes, adding items like baby washcloths, bibs, pacifiers, teething toys, socks, or baby care products makes the gift more useful and personalized.
What is the best way to transport a diaper cake to a baby shower?
Place the diaper cake on a sturdy base and wrap it in clear cellophane to keep it secure. Transport it on a flat surface to prevent shifting or damage during travel.
Can You Really Make a Diaper Cake This Beautiful at Home?
Equipment
- Cardboard cake board or decorative tray
- Paper towel roll or cardboard tube
- Scissors
- Double-sided tape
- Hot glue gun (for decorations only)
- Clear cellophane wrap
- Ribbon
Ingredients
For the Diaper Cake Base
- 50 –70 diapers Size 1 or Size 2 recommended
- 1 paper towel roll or cardboard tube
- 1 sturdy cake board
Optional Baby Essentials
- Baby socks
- Washcloths
- Bibs
- Pacifiers
- Teething toys
- Baby lotion or shampoo
- Small stuffed animal
Decorations
- Satin or grosgrain ribbon
- Fabric flowers
- Bows
- Artificial greenery
- Name sign or topper
- Gift tag
Instructions
Step 1: Prepare Your Workspace
- Clean and sanitize your work surface
- Organize all supplies within reach
- Separate diapers into groups for each tier
Step 2: Roll the Diapers
- Lay each diaper flat
- Roll tightly from front to back
- Secure each roll with a small rubber band
- Repeat until all diapers are rolled
Step 3: Build the Bottom Tier
- Place the cardboard tube in the center of the cake board
- Arrange rolled diapers around the tube
- Create 2–3 rings of diapers
- Secure the entire tier with a large rubber band
Step 4: Create the Middle Tier
- Build a smaller ring of diapers
- Secure with a large rubber band
- Place directly on top of the bottom tier
Step 5: Build the Top Tier
- Use the fewest diapers for the smallest layer
- Secure tightly with a rubber band
- Stack on top of the middle tier
Step 6: Secure the Structure
- Slide all tiers over the center tube
- Adjust until perfectly centered
- Check for wobbling and tighten if needed
Step 7: Decorate
- Wrap ribbon around each tier to hide rubber bands
- Tuck baby socks, washcloths, or bibs into the ribbons
- Add flowers, bows, or themed decorations
- Place a topper or stuffed animal on top
Step 8: Wrap for Gifting
- Cover with clear cellophane
- Gather at the top
- Tie with a decorative ribbon
- Attach a personalized gift tag
Notes
Quick Tips for Best Results
- Use Pampers Swaddlers Size 1 or 2 for the most practical gift
- Roll diapers tightly for a professional look
- Keep all diaper rolls facing the same direction
- Use wide ribbon to completely hide rubber bands
- Add useful baby items instead of purely decorative pieces
- Match decorations to the baby shower theme
- Make the cake 1–2 days before the event for the freshest presentation